Creating CxF/X-4 Data from Files
You can create CxF/X-4 files from the color data stored in CGATS measurement files, legacy CxF1 and CxF3 files, and QTX files. It is also possible to import the CxF/X-4 color data stored in PDF/X documents and existing CxF/X-4 files. The metadata information can be corrected, missing metadata can be added.
- Load the files to be imported or converted:
Drag a CxF1, CxF2, CxF3, CxF/X-4, CGATS or QTX file onto the ORIS CxF Toolbox window.
Click
 on the left, then click
  on the right and select such files or PDF/X files. Hold the Shift or Ctrl key pressed down to select multiple files.
Use
 and
and  to successively load all files of the selected type available in the current folder (only one at a time).
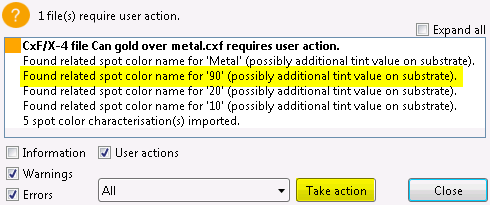
- If a log window appears, click on the messages to see more details, then close the window.
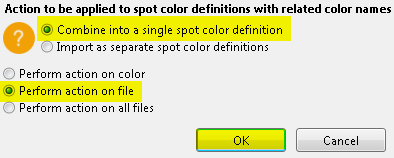
If a user action is required, however, click on the message details. Then click on a color name, select the action and specify whether to apply it to all colors or all files. Then click OK and close the window.
The following situations require a user action, for example:
Spot colors with invalid spectral data. Such definitions can be discarded.
Spot colors with similar names interpreted as different tint values of the same color. Example: Blue, Blue10, Blue20 … Blue90. Such colors can be combined into a single color.
Spot colors with similar names interpreted as identical tints of the same color, one printed on the substrate and one on black. Example: Blue and Blue_K. Such colors can also be combined.

- If you want to load color data from additional files, click
 .
.
Now the button is displayed with an underline
 . The color definitions will no longer be removed from the dialog when additional files are loaded.
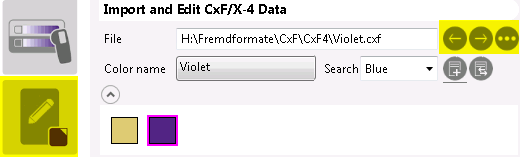
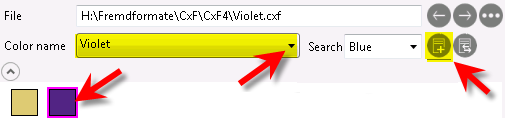
 - Select a CxF/X-4 color definition using the Color name list or by clicking on the color box underneath the list. Click the
 button if the color boxes are not visible.
If the color list is long, enter parts of the name into the Search box. The color will be selected automatically. If your input matches more than one name, you can select from a list that contains only names that match your input.
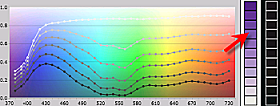
- To inspect the spectral curves, click on a patch in the tint ramp. Ctrl-click to add the spectral curve to those displayed already.
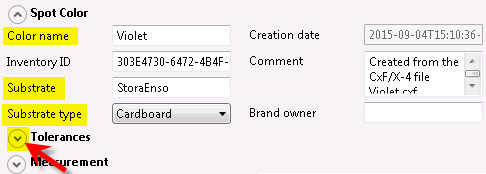
- Correct or complete the metadata fields of the selected color definition.
Metadata already tagged in the imported files is added automatically to the appropriate fields if applicable. Some fields are automatically set to default values.
Click the
buttons to expand the metadata groups if required.Note:Specifying a spot color name, substrate name and substrate type is mandatory. These fields cannot be left empty or undefined.
- Repeat steps 4 and 6 to view and edit additional color data.
In bulk-edit mode, you can change multiple color definitions in one go. Click
 and refer to Multi-Color Editing and Deleting for more details.
 - Click
 if you want to delete the selected color definition.
 - Click
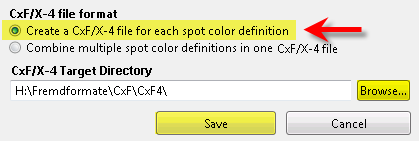
 to save the color definitions in CxF/X-4 format. A dialog appears. Select one of the following options:
Combine multiple spot color definitions in one CxF/X-4 file
Select a target directory, enter a file name, then click Save.
This creates a single CxF/X-4 file with all spot colors.
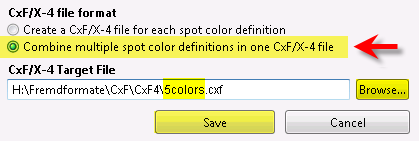
Create a CxF/X-4 file for each spot color definition
Select a target directory, then click Save.
Each spot color will be saved as a separate CxF/X-4 file. The color names will be used as file names.